
Metafields
Files
The Ragnok theme supports the ragnok.files metafield on products.
We use this field to allow you to add file information to your products so that your customers can easily know the amount, type and extension of the files that each product includes.
Below, you will find information on how to create the files metaobject and metafield, how to add files to a product and display them:
- Creating the Product File metaobject
- Creating the Files metafield
- Adding files to a product
- How to filter products by file
Please note that we have created many File Extension Stickers for you to be able to use the ones you need. If you need to create new extensions or customize them (font, color) you can do it by editing the Figma file we include in the Resources section of this documentation.
Frequently asked questions:
- What files / extensions are supported by the theme?
- Can i change the images that are displayed for each file type?
- Can i add support for more files / extensions?
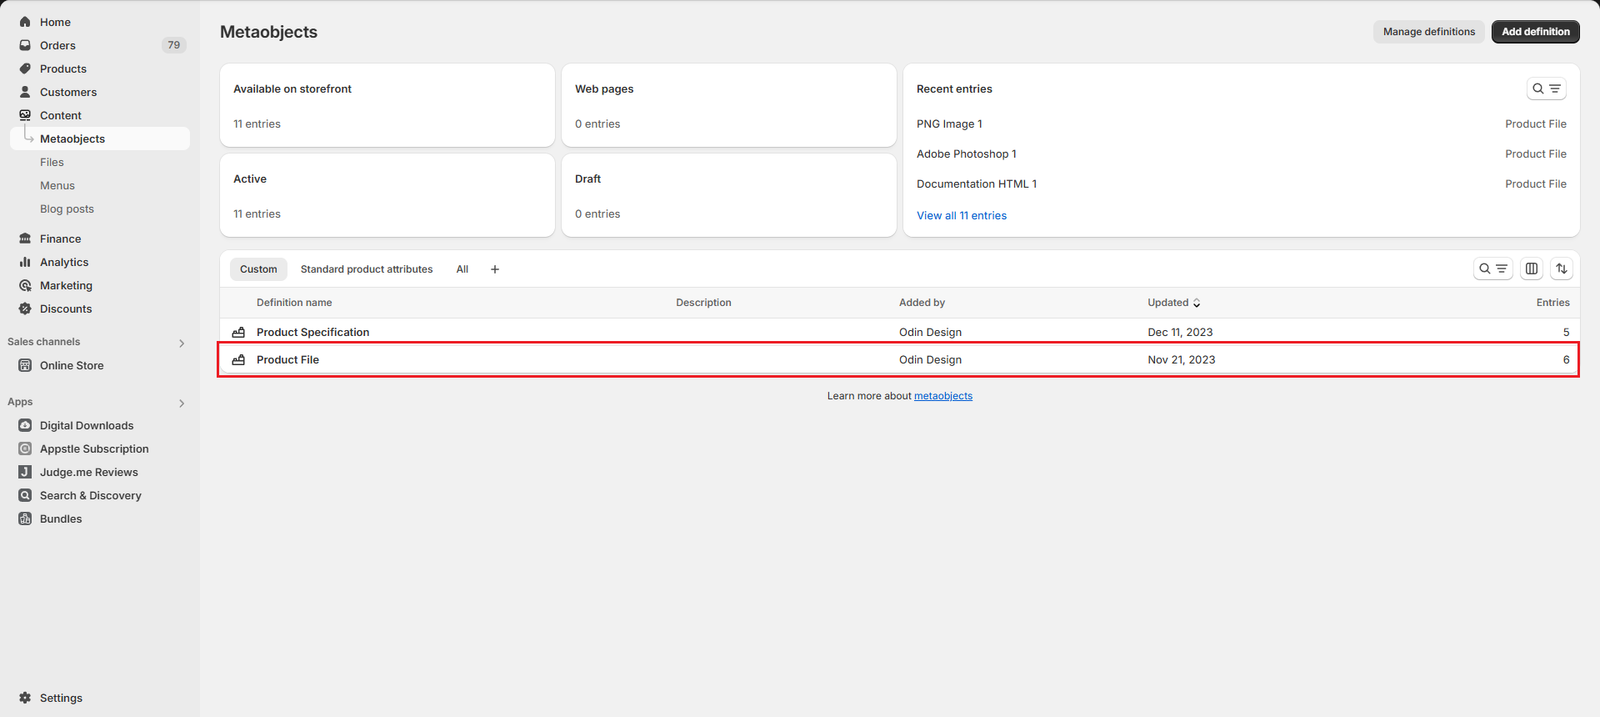
1. Creating the Product File metaobject
First, you need to create the Product File metaobject, which will contain all file related data.
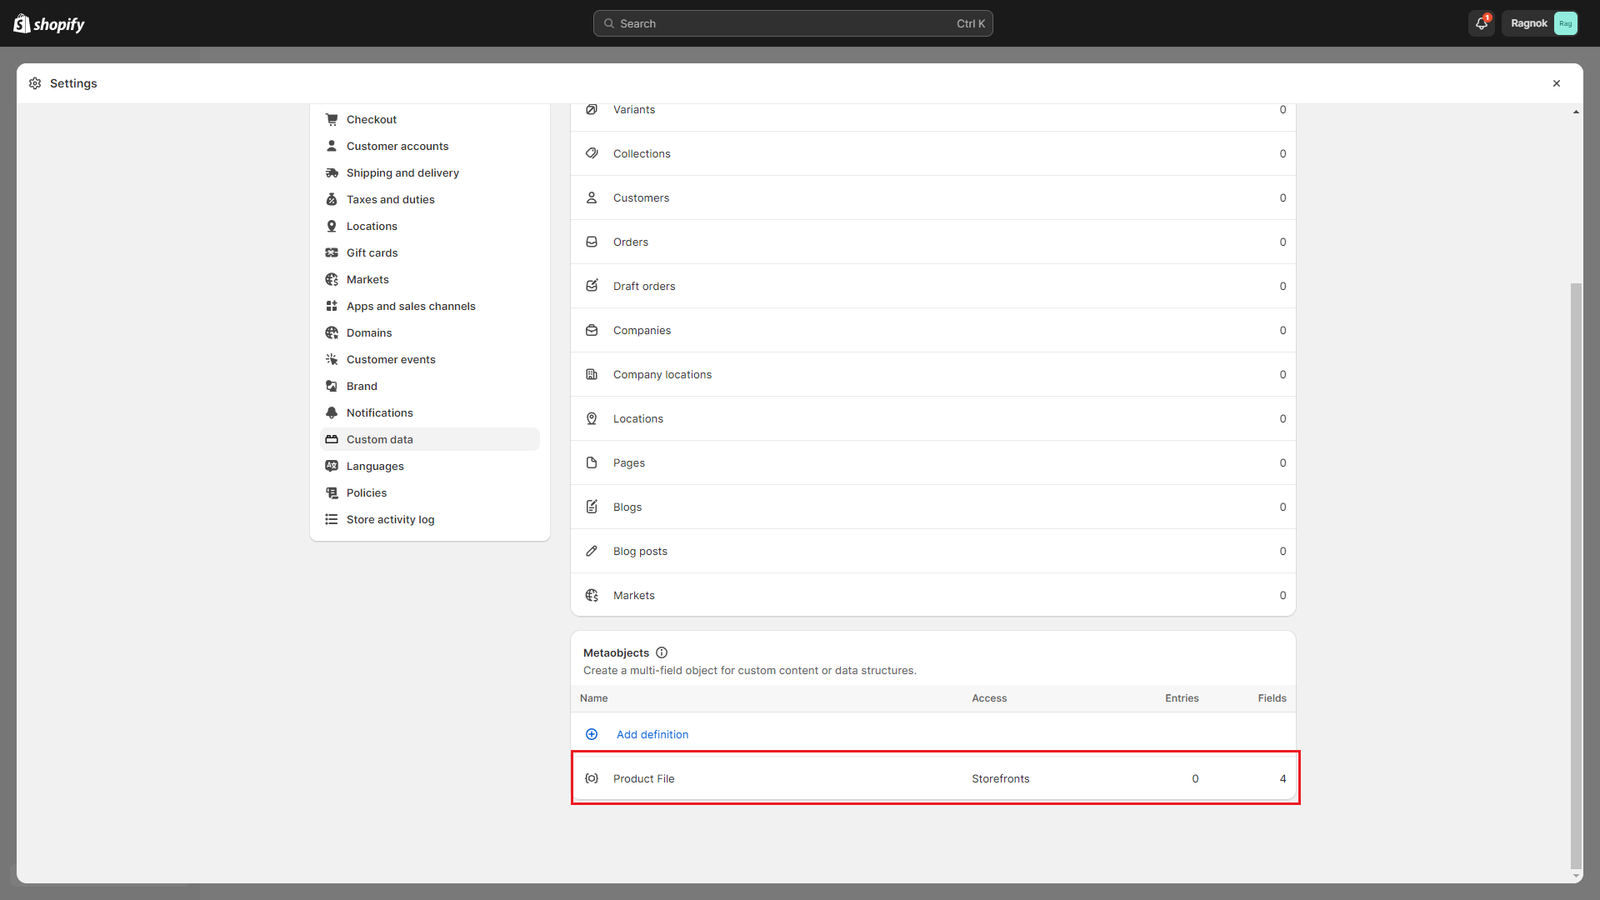
a) From your Shopify admin, go to Settings > Custom data.
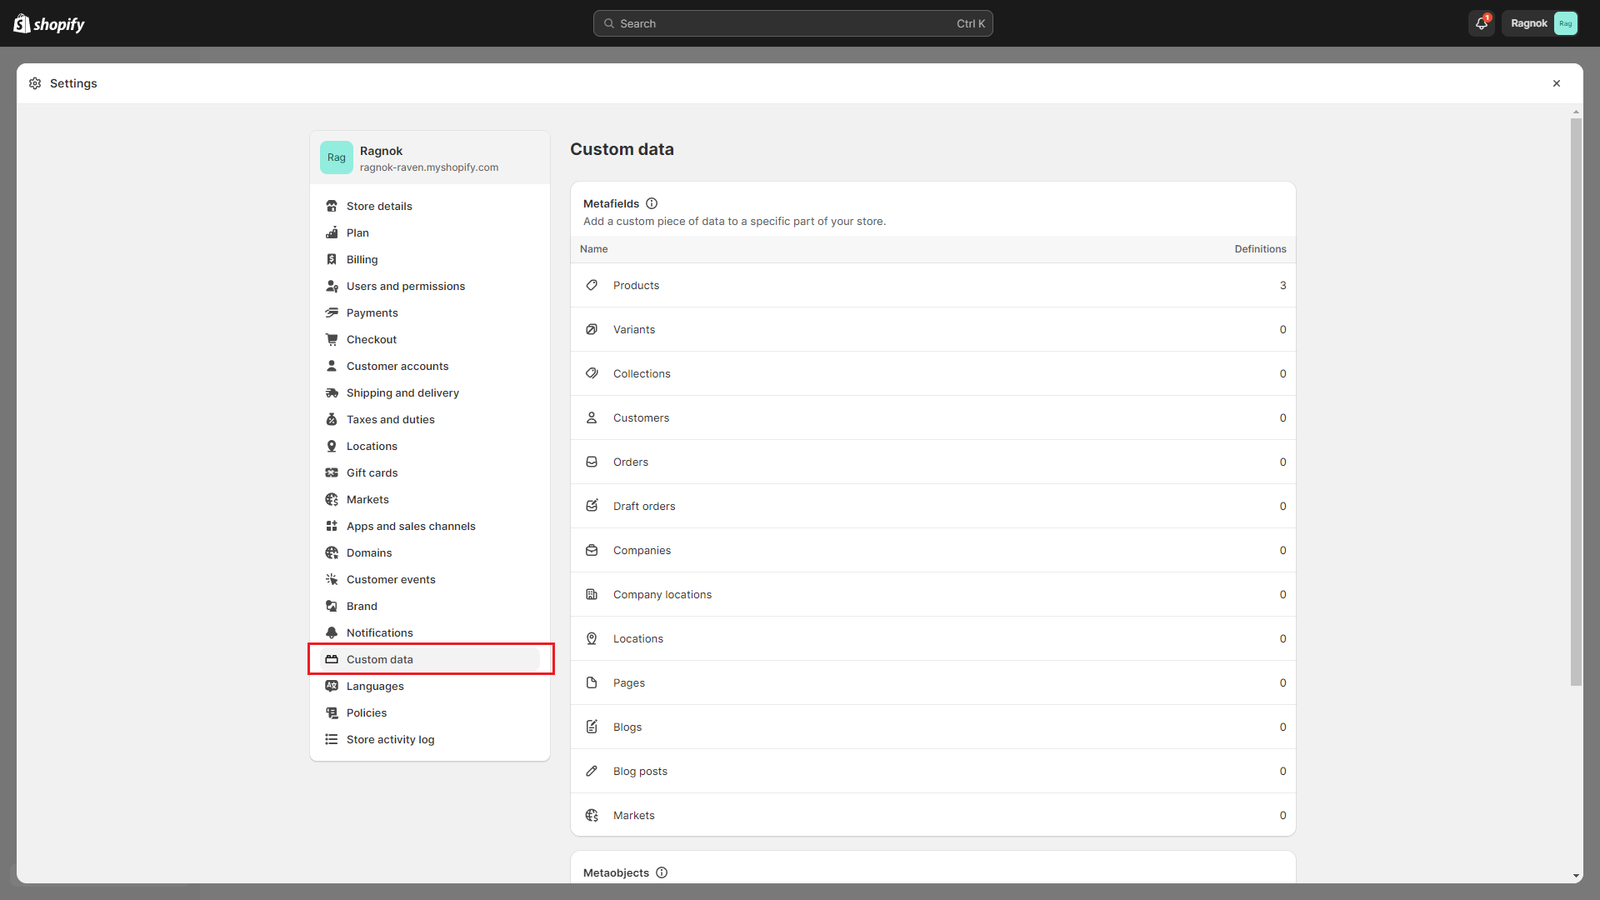
b) Scroll down to Metaobjects and click Add definition.
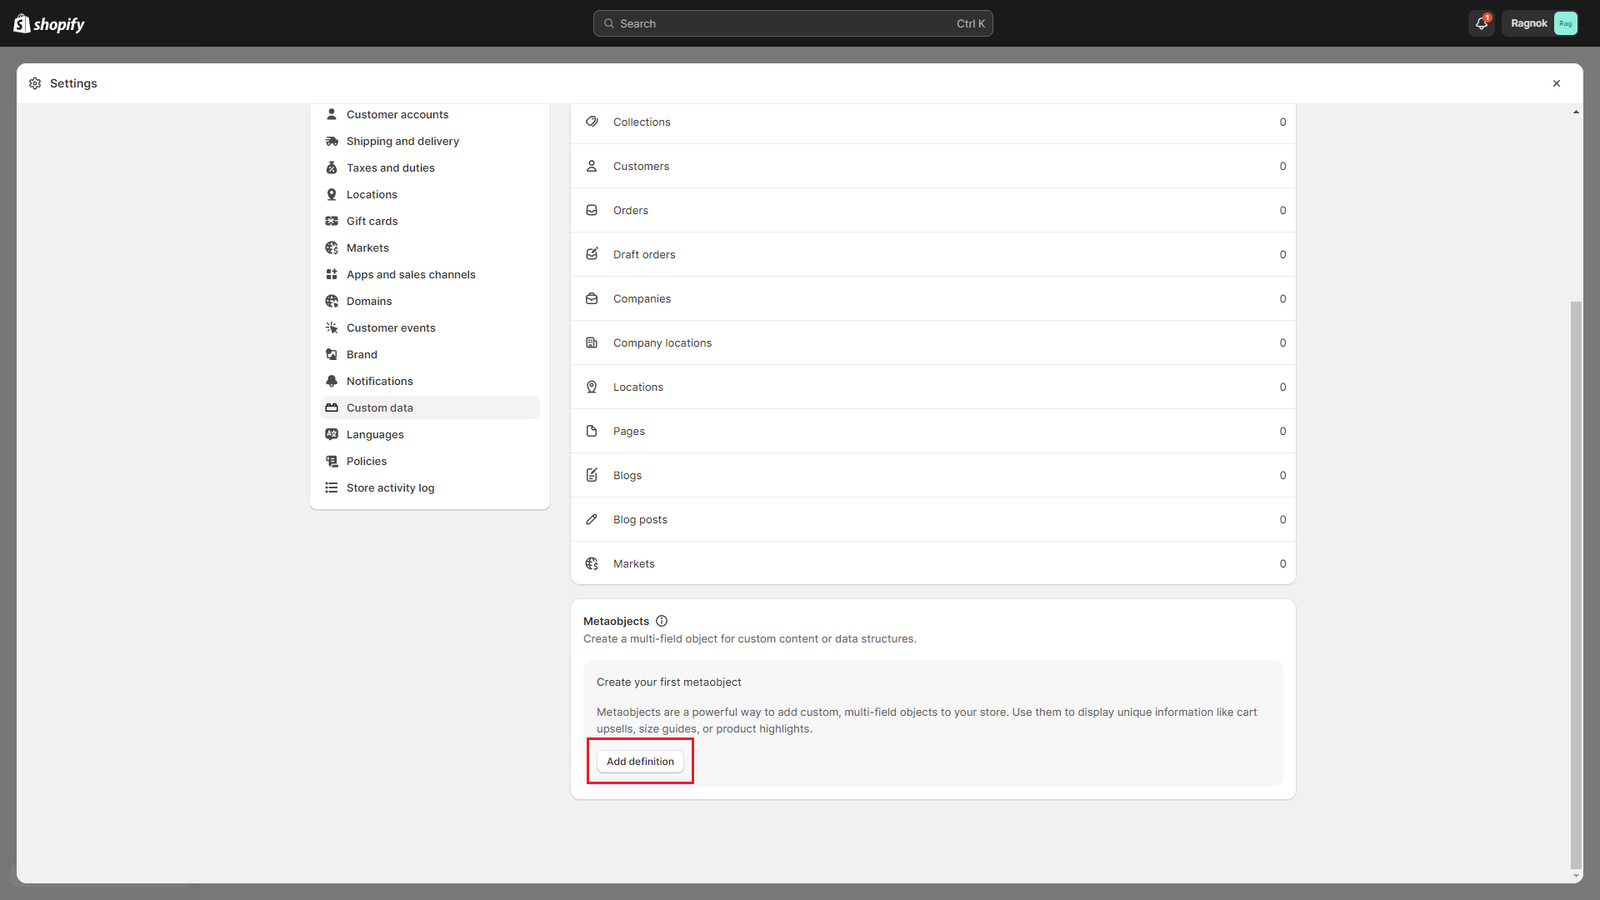
c) In the Name field, enter “Product File“.
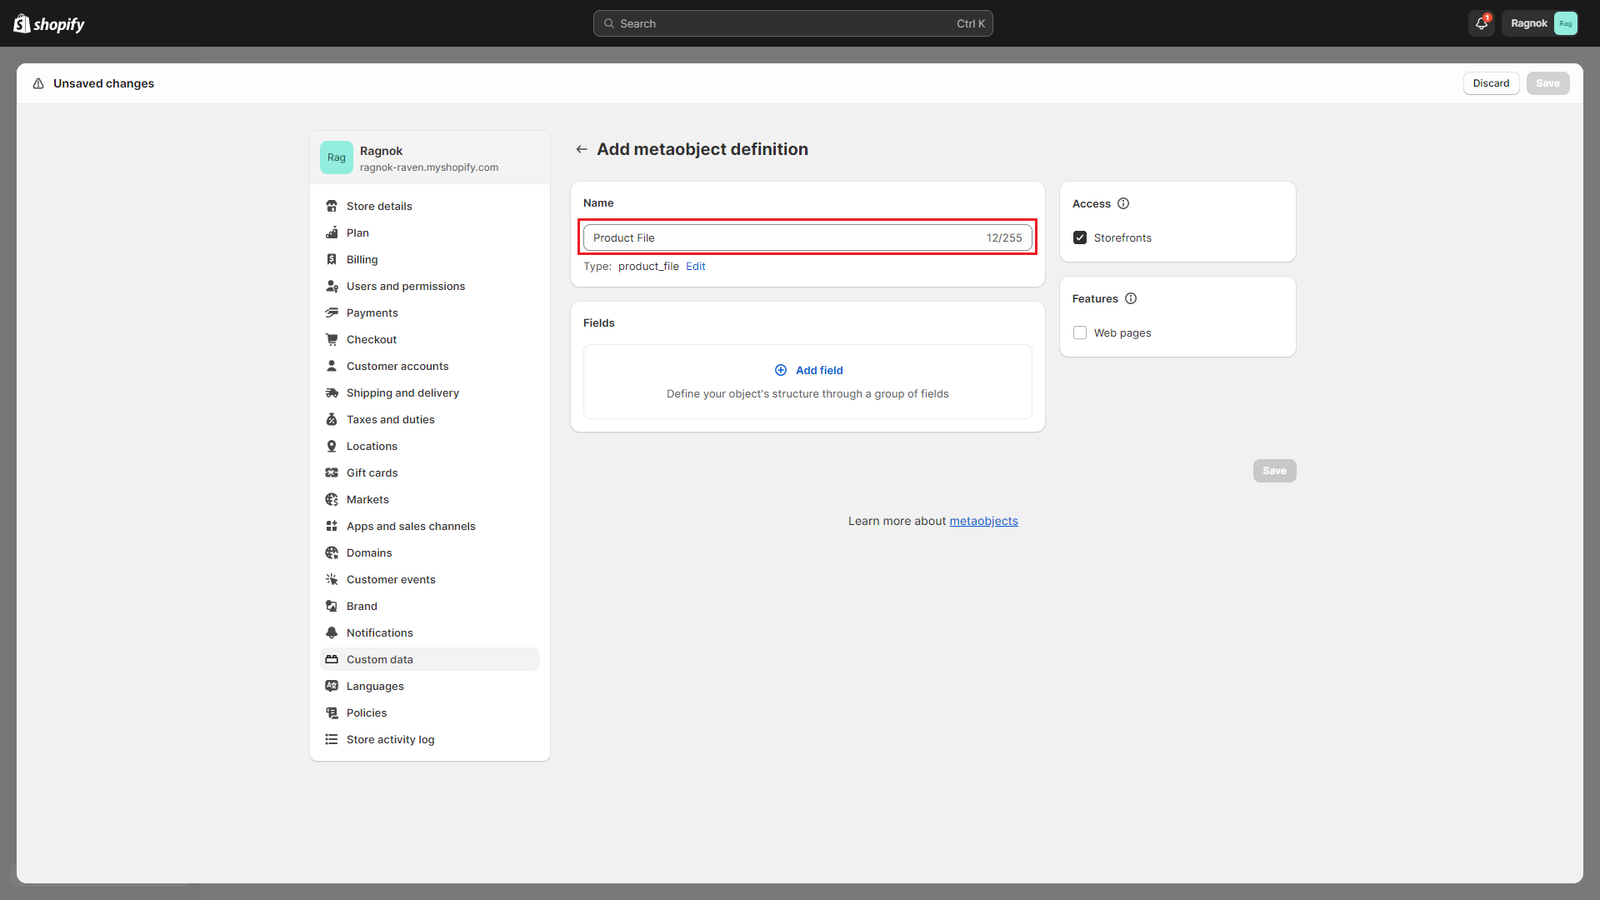
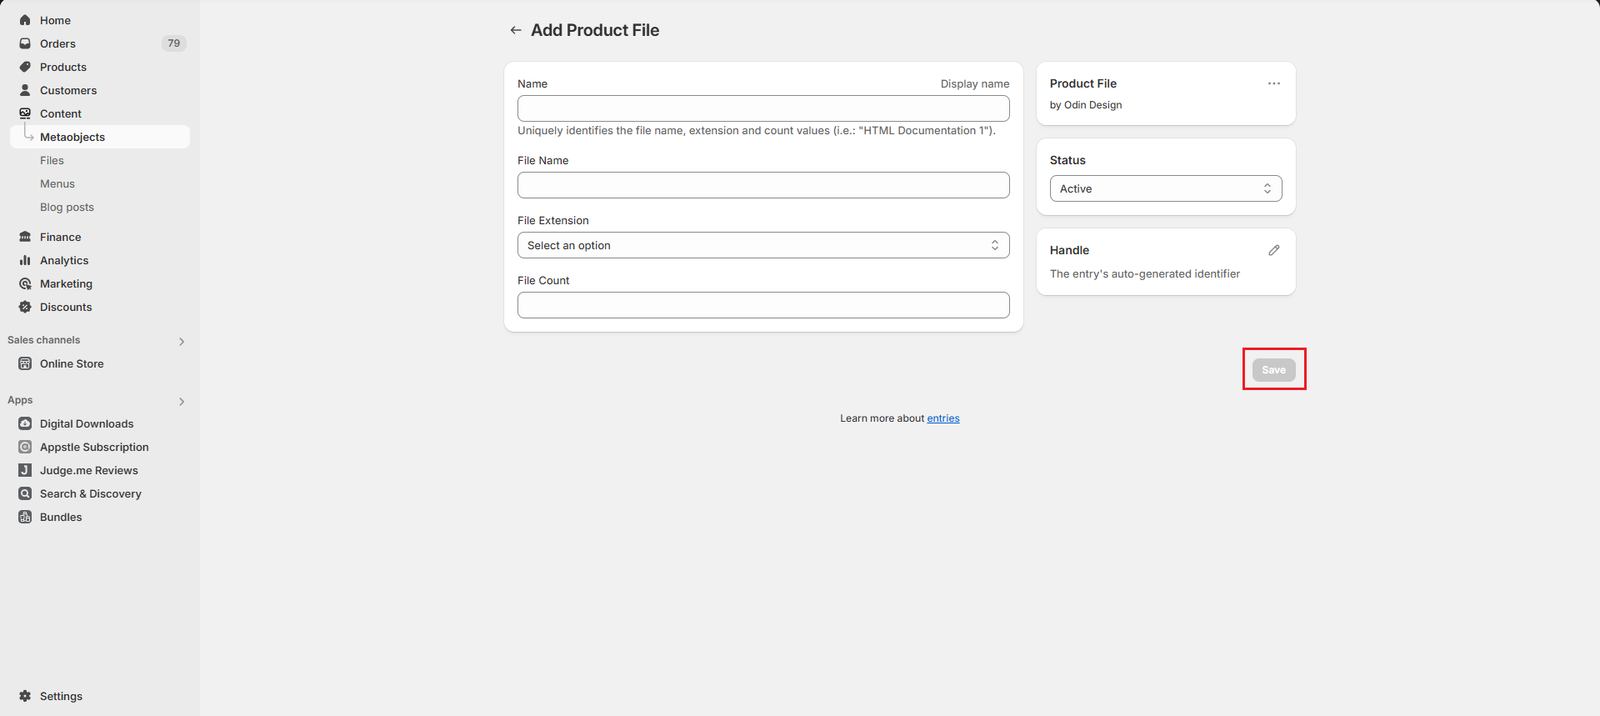
d) Add the following fields:
- Name
- Click Add field.
- Select Single line text.
- In the Name field, enter “Name“.
- In the Description field, enter “Uniquely identifies the file name, extension and count values (i.e.: “1 HTML Documentation”)“.
- Click Add to add the field.

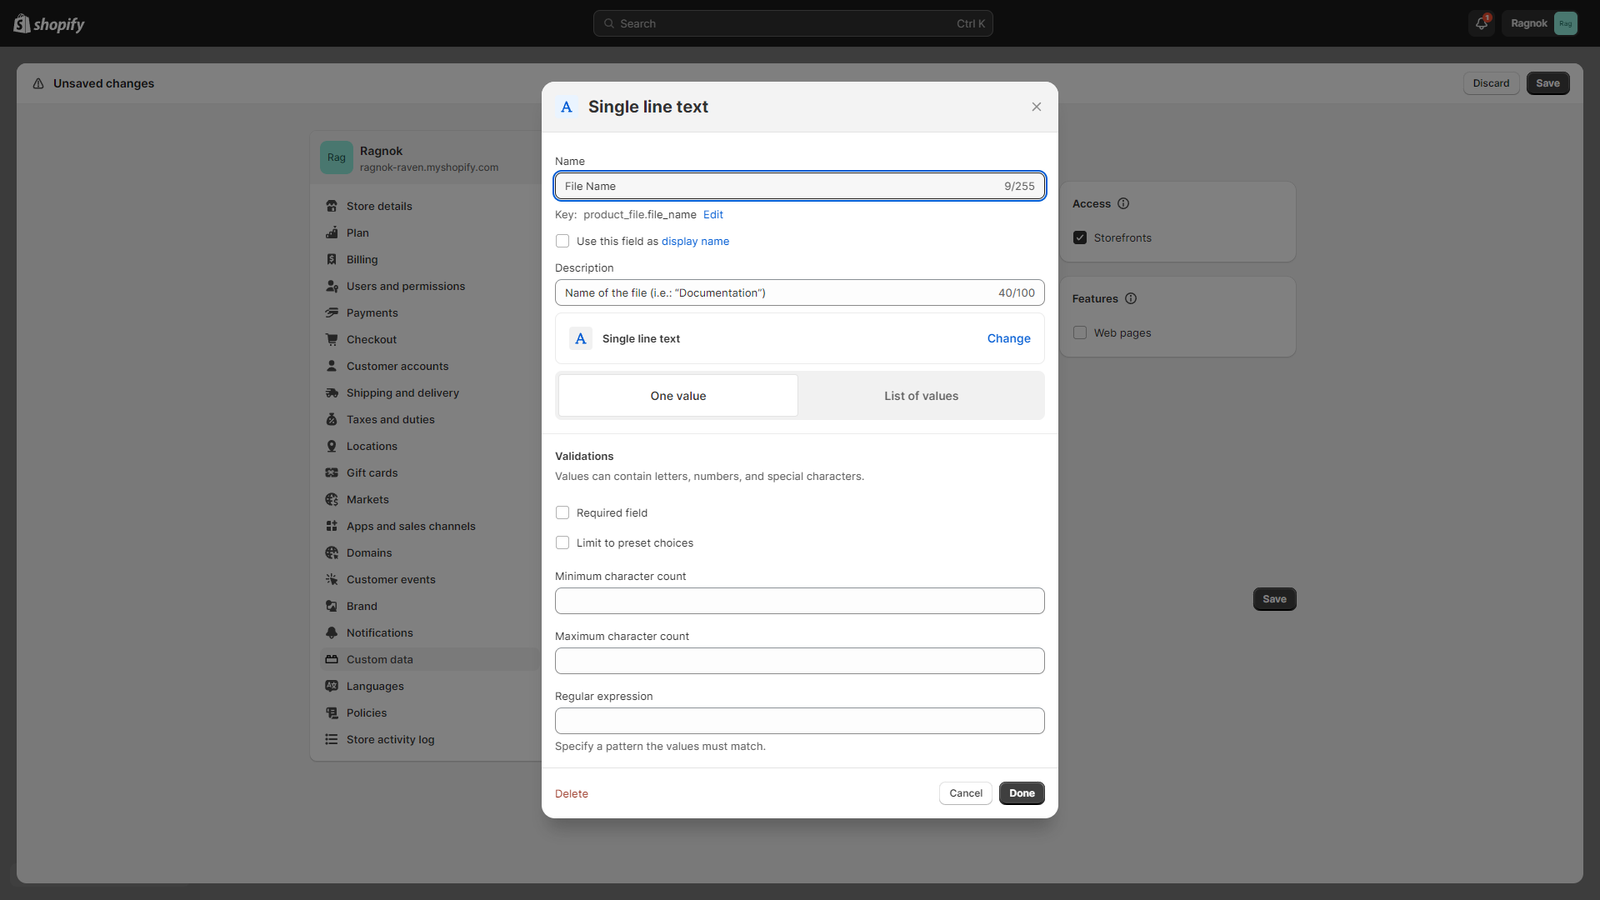
- File Name
- Click Add field.
- Select Single line text.
- In the Name field, enter “File Name“.
- In the Description field, enter “Name of the file (i.e.: “Documentation”)“.
- Click Add to add the field.
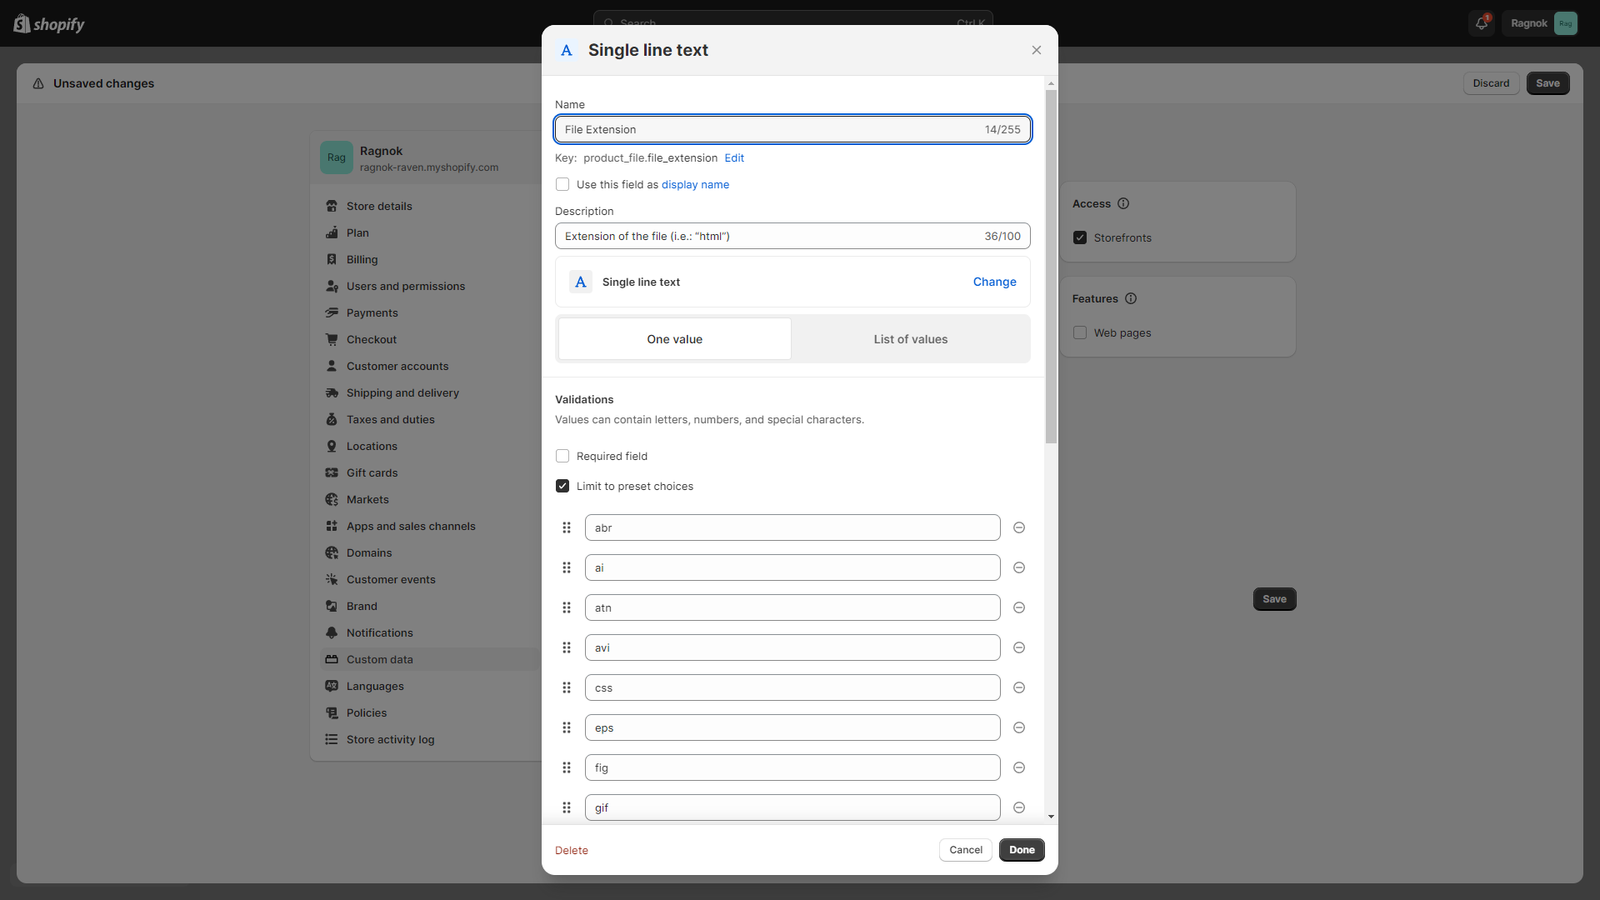
- File Extension
- Click Add field.
- Select Single line text.
- In the Name field, enter “File Extension“.
- In the Description field, enter “Extension of the file (i.e.: “html”)“.
- Enable the Limit to preset choices option.
- Add a new item for each file extension and enter its name, you can view all supported file extension names in this table.
- Click Add to add the field.
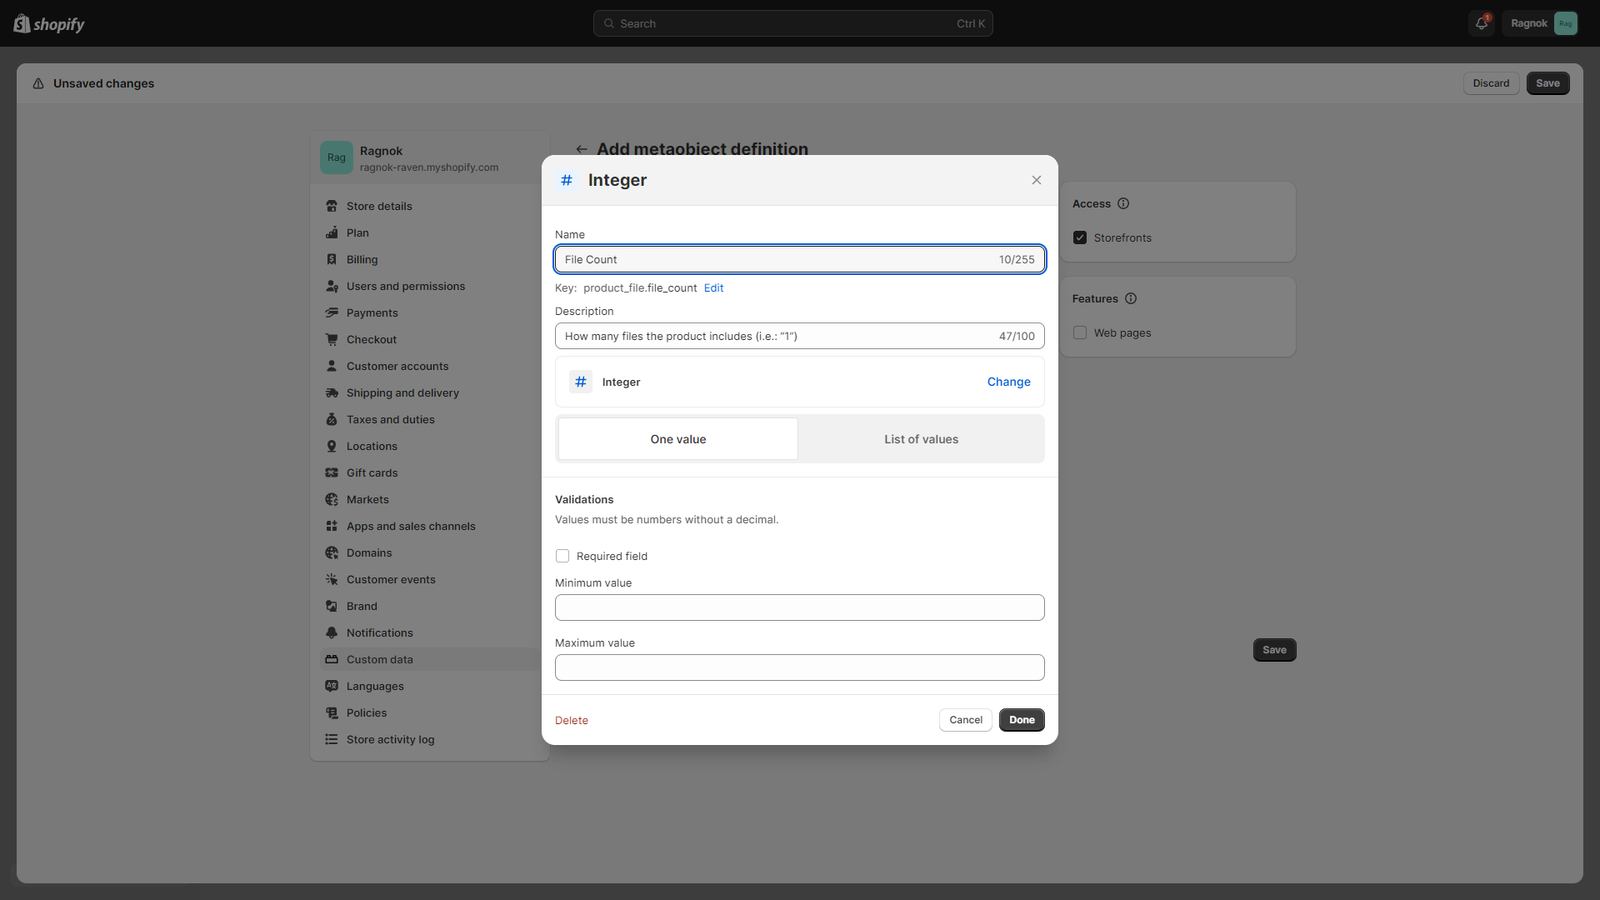
- File Count
- Click Add field.
- Select Integer.
- In the Name field, enter “File Count“.
- In the Description field, enter “How many files the product includes (i.e.: “1”)“.
- Click Add to add the field.
e) When you are done, click Save to finish and your Product File metaobject will be created.
2. Creating the Files metafield
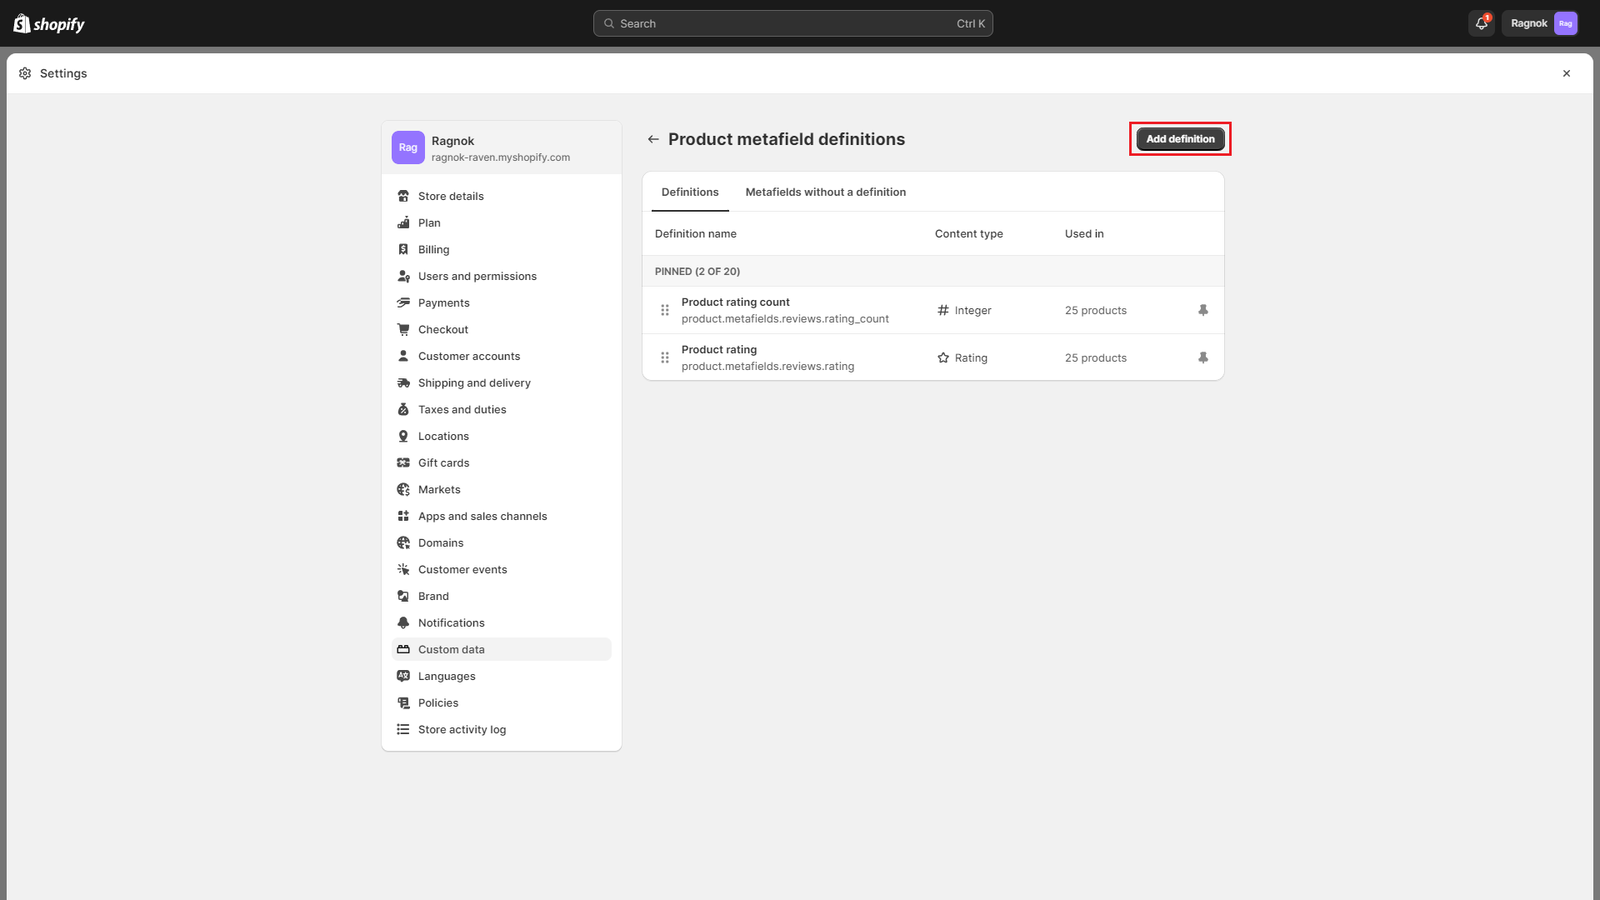
a) From your Shopify admin, go to Settings > Custom data.

b) Select Products and click Add definition.
c) In the Name field, enter “Files“.
d) In the Namespace and key field, enter “ragnok.files“.
e) In the Description field, enter “Name, extension and count for each file type that the product contains.“
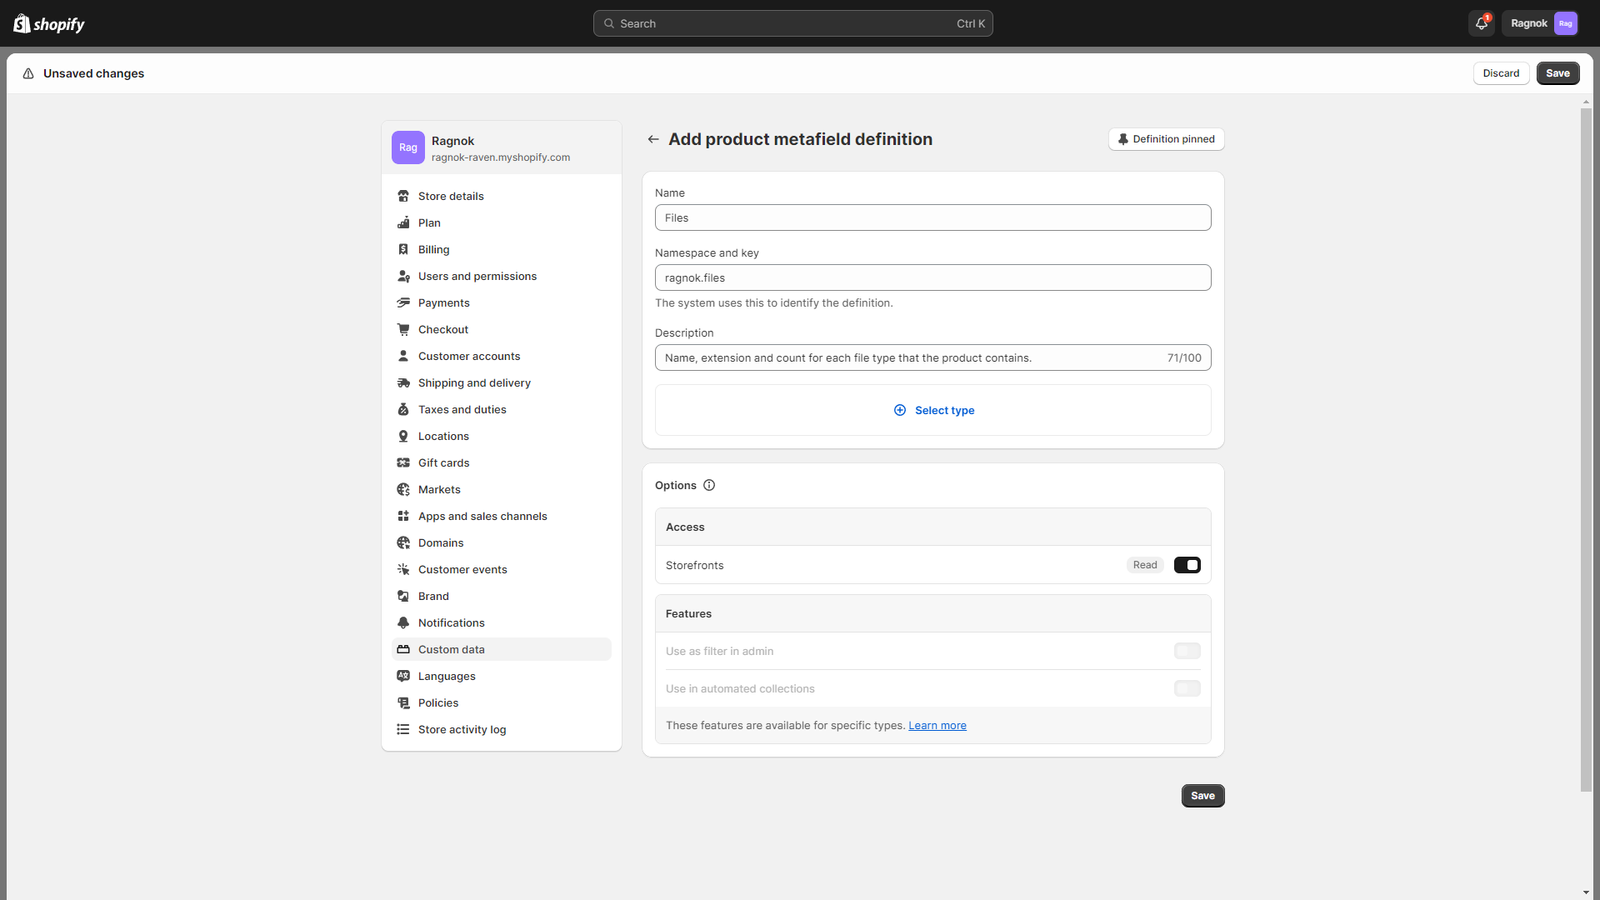
f) Click Select type, and then select “Metaobject” (under “Reference“).
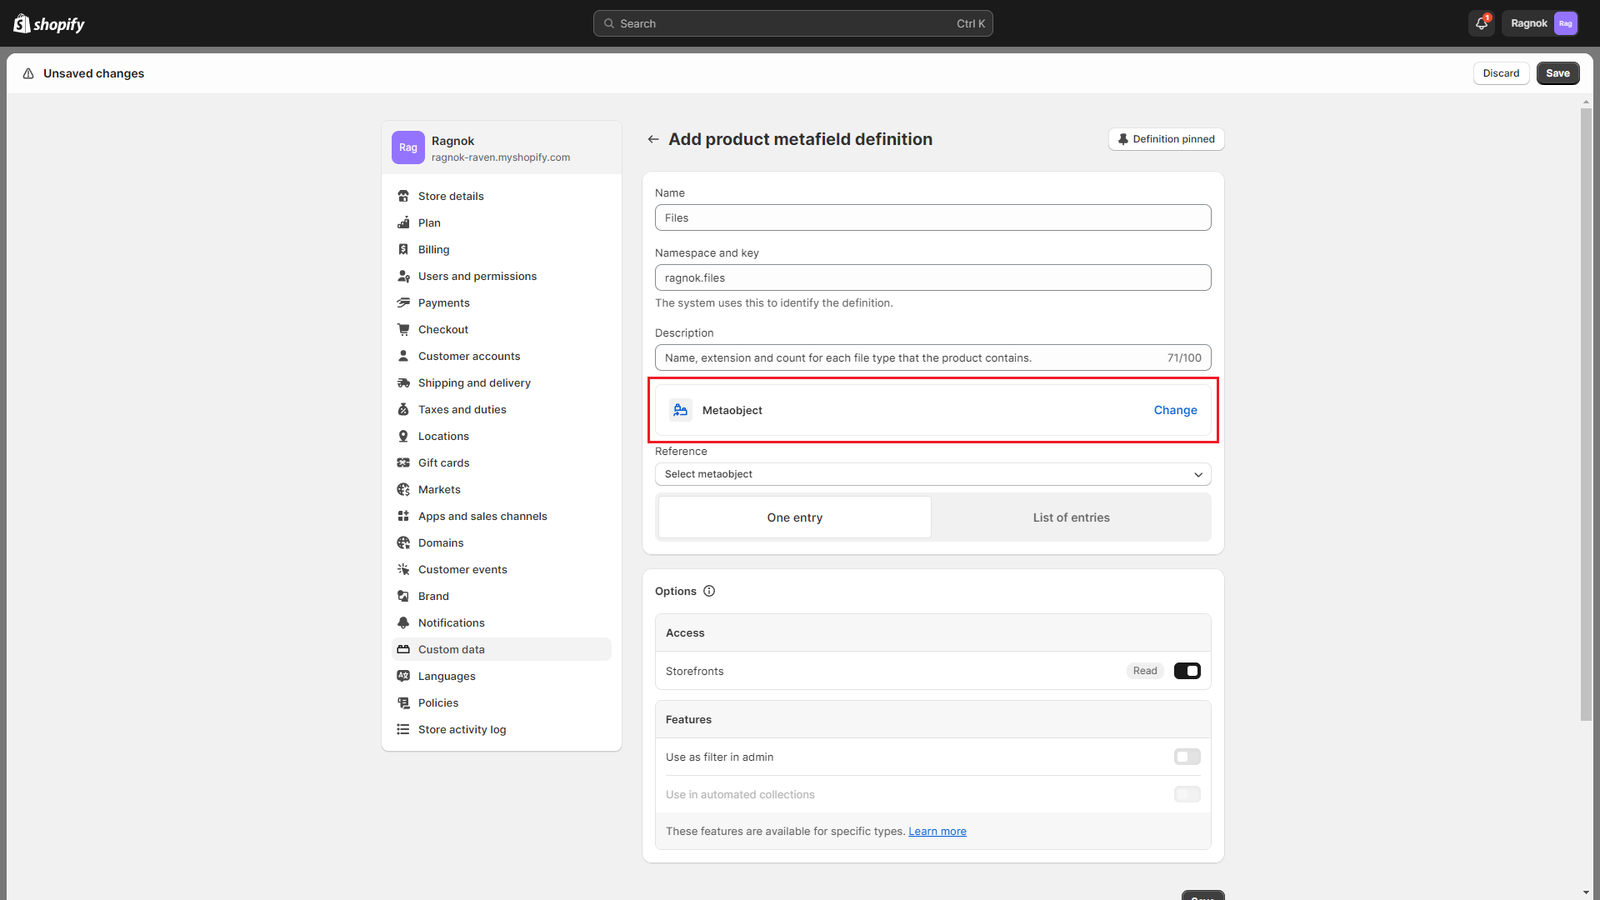
g) Click on Select metaobject and select the previously created Product File metaobject and select List of entries, which will allow you to enter more that one file per product.
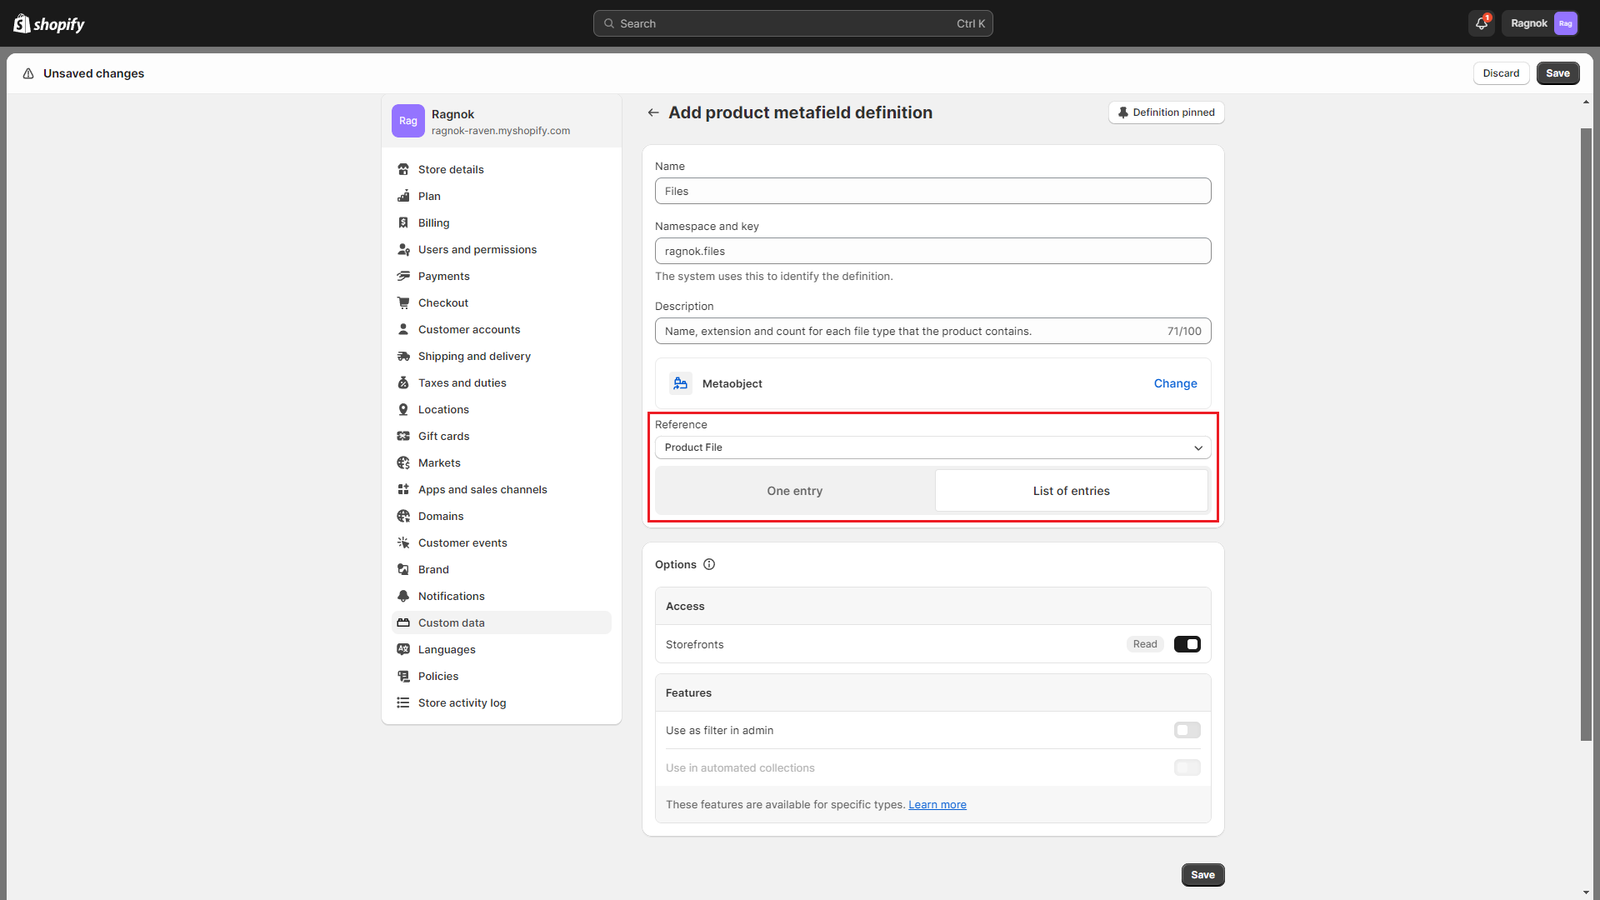
h) Click Save to create the Files metafield.
3. Adding files to a product
In order to add files to a product, you need to:
Create the file:
- Go to your backend Content > Metaobjects menu.
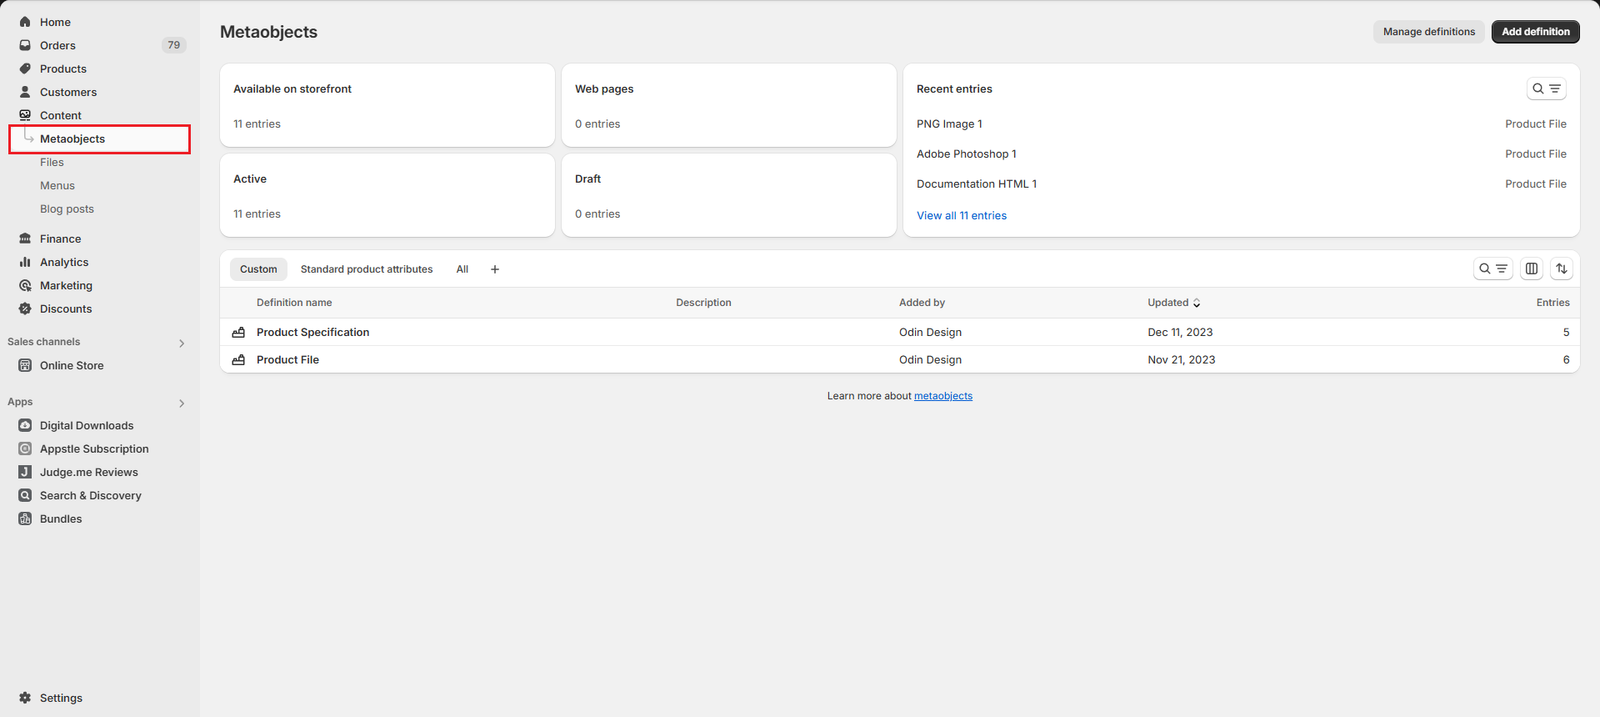
- Select Product File
- Click on the Add Entry button at the top right side of the screen
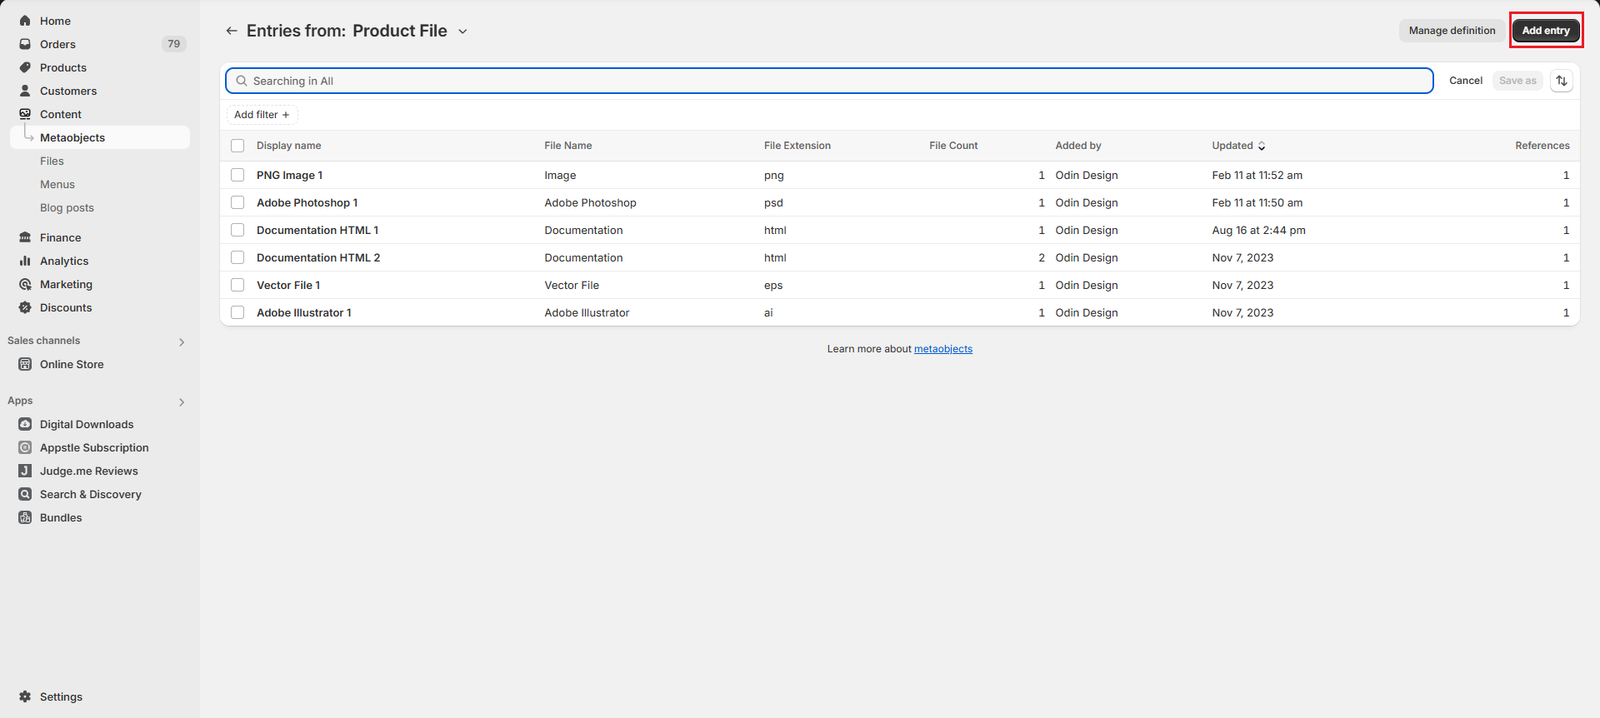
- Add your desired file details and click on the Save button at the bottom right of the screen.
Assign the file to a product:
- Go to your backend Products menu and click on the product you want to add file information to
- Scroll to the bottom until you find the Product metafields section
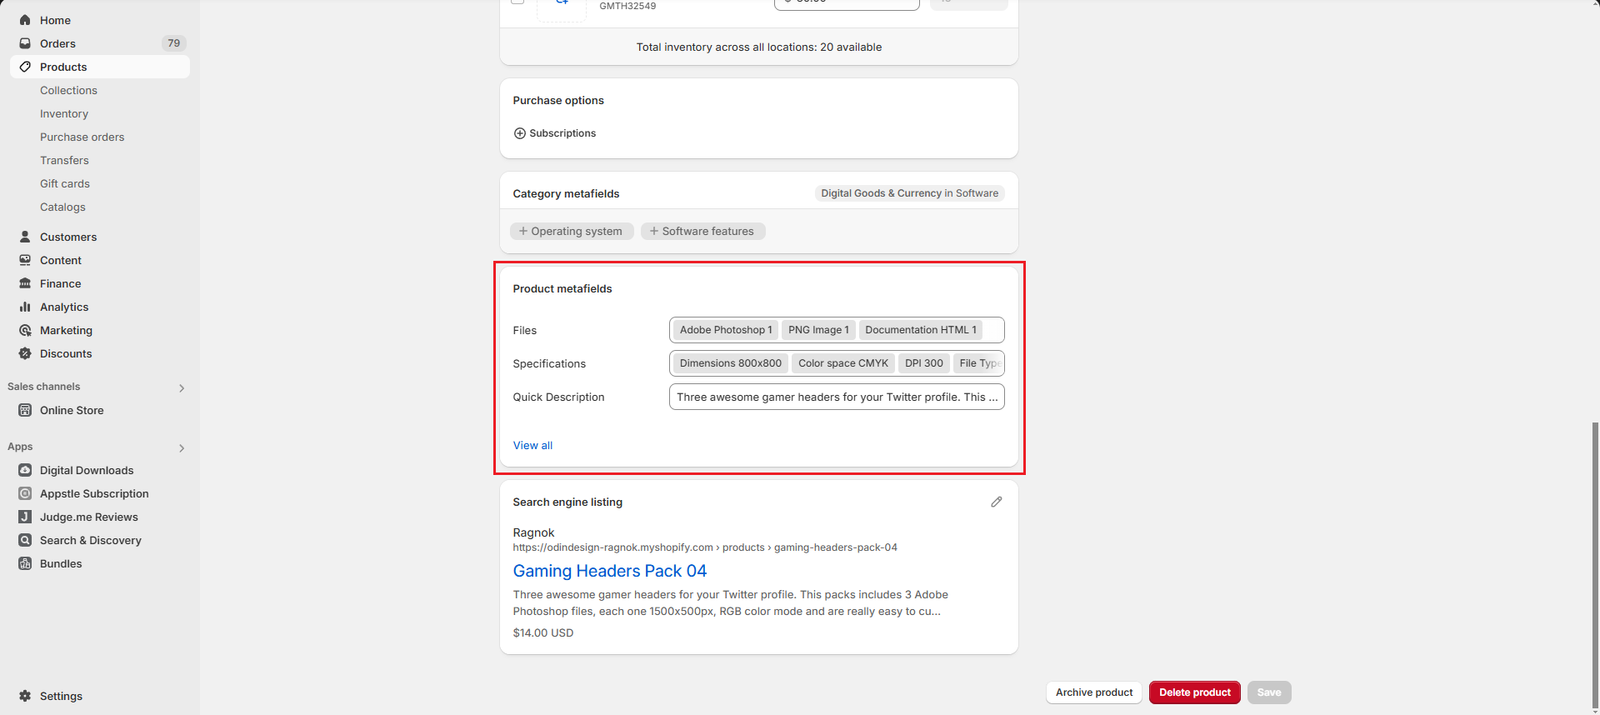
- Click on Files
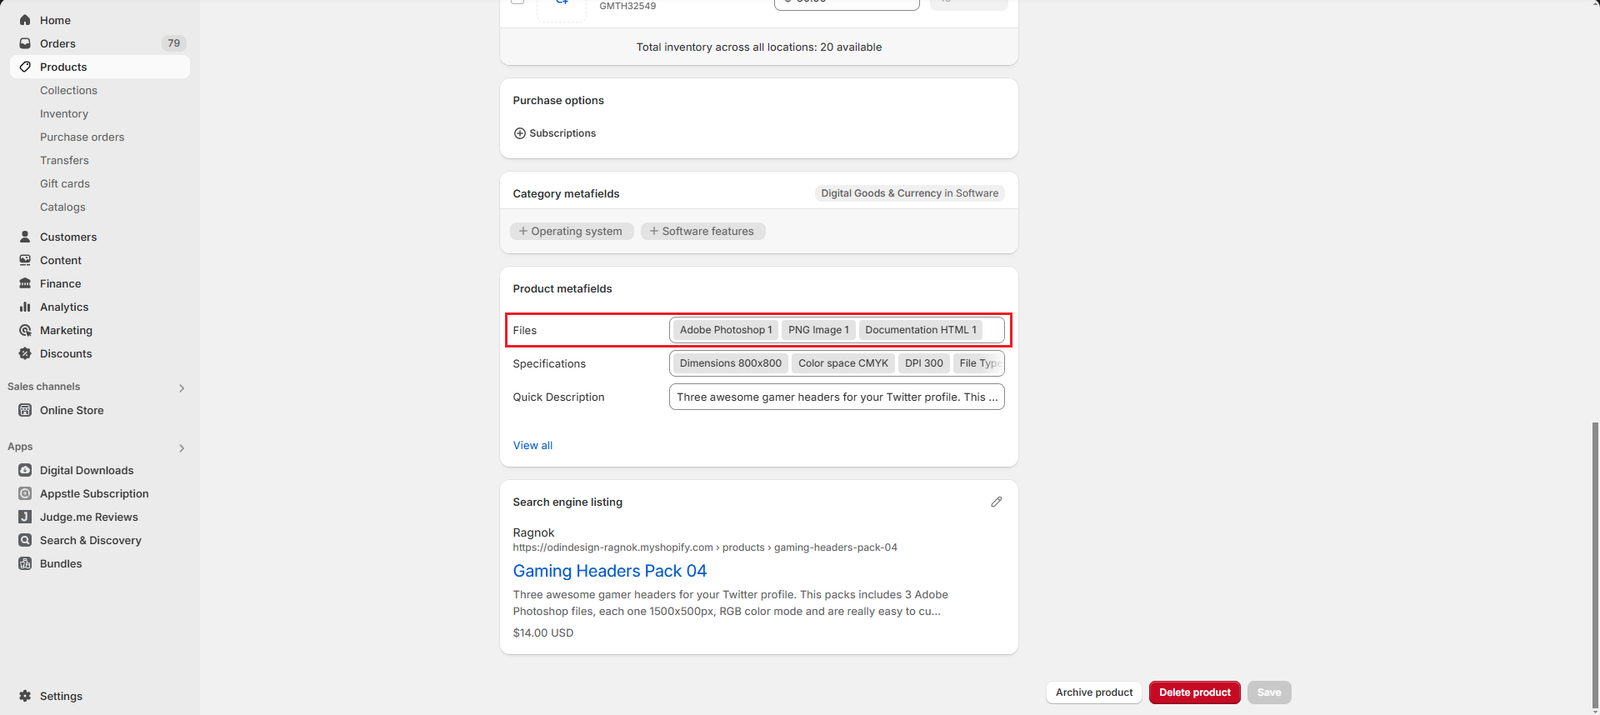
- Select the file you want to add
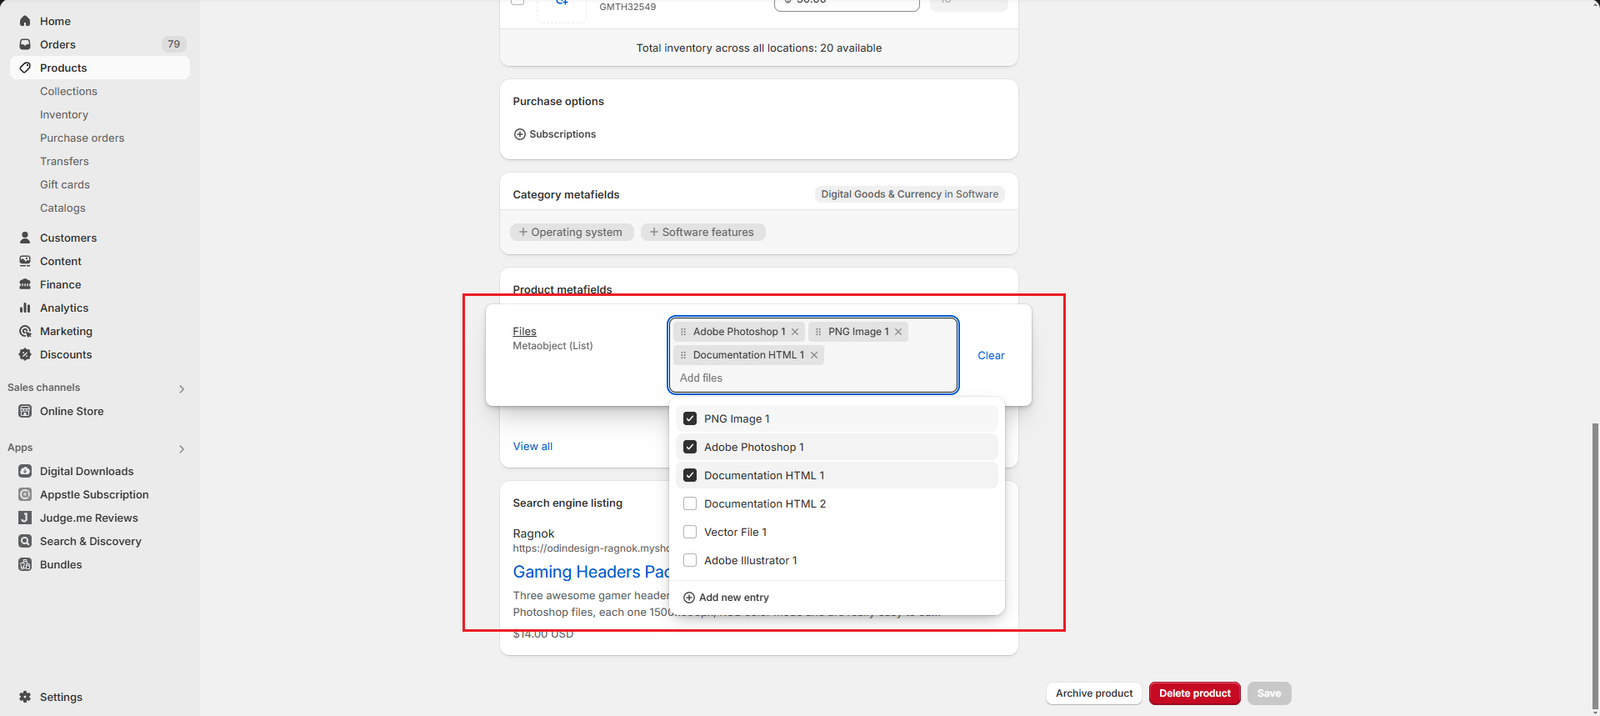
- Click on the Save button to update your product with the new file information
How to Filter Products by File
When using sections like the Files bar and Features Files, if you click on a file type you will be redirected to your products page filtering by products tags with the name of the file extension.
Filtering products by tag or application
We allow you to choose whether you want to use the default collections tag filter or the Search & Discovery application:
- Default collections tag filter
- Search & Discovery application
- How to choose between the default collections tag filter and Search & Discovery application
Default collections tag filter
The default collections tag filter redirects to the following URL to filter by tag: https://yourstorename.myshopify.com/collections/all/fileTagName
Where fileTagName could be, for example psd: https://yourstorename.myshopify.com/collections/all/psd
Search & Discovery application
In order to use this application, you need to install it in your store, you can find the application here.
After installing it, you have to enable Tag filtering, you can do so by:
- Open your store admin page, go to your Apps and open the Search & Discovery application
- Click on Customize filters
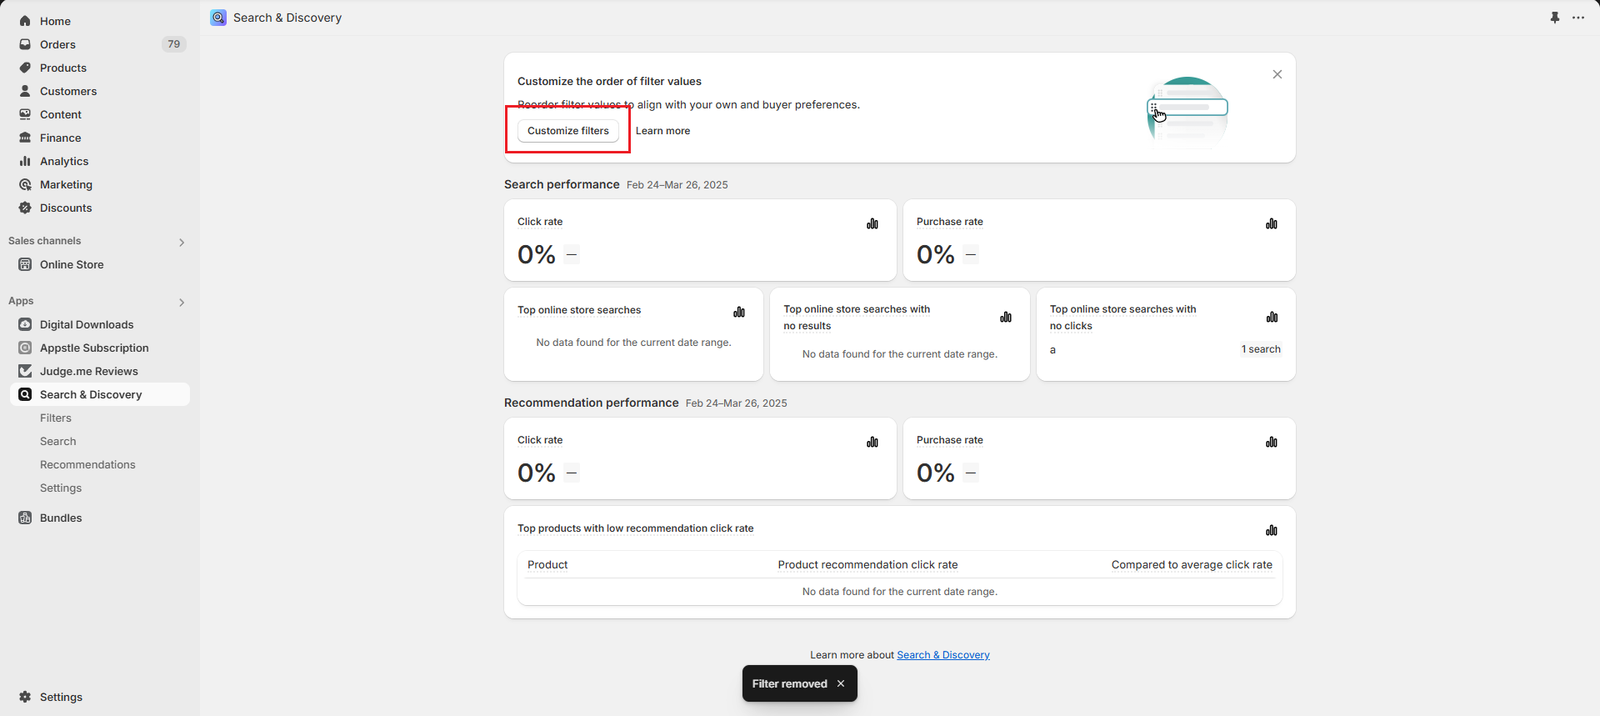
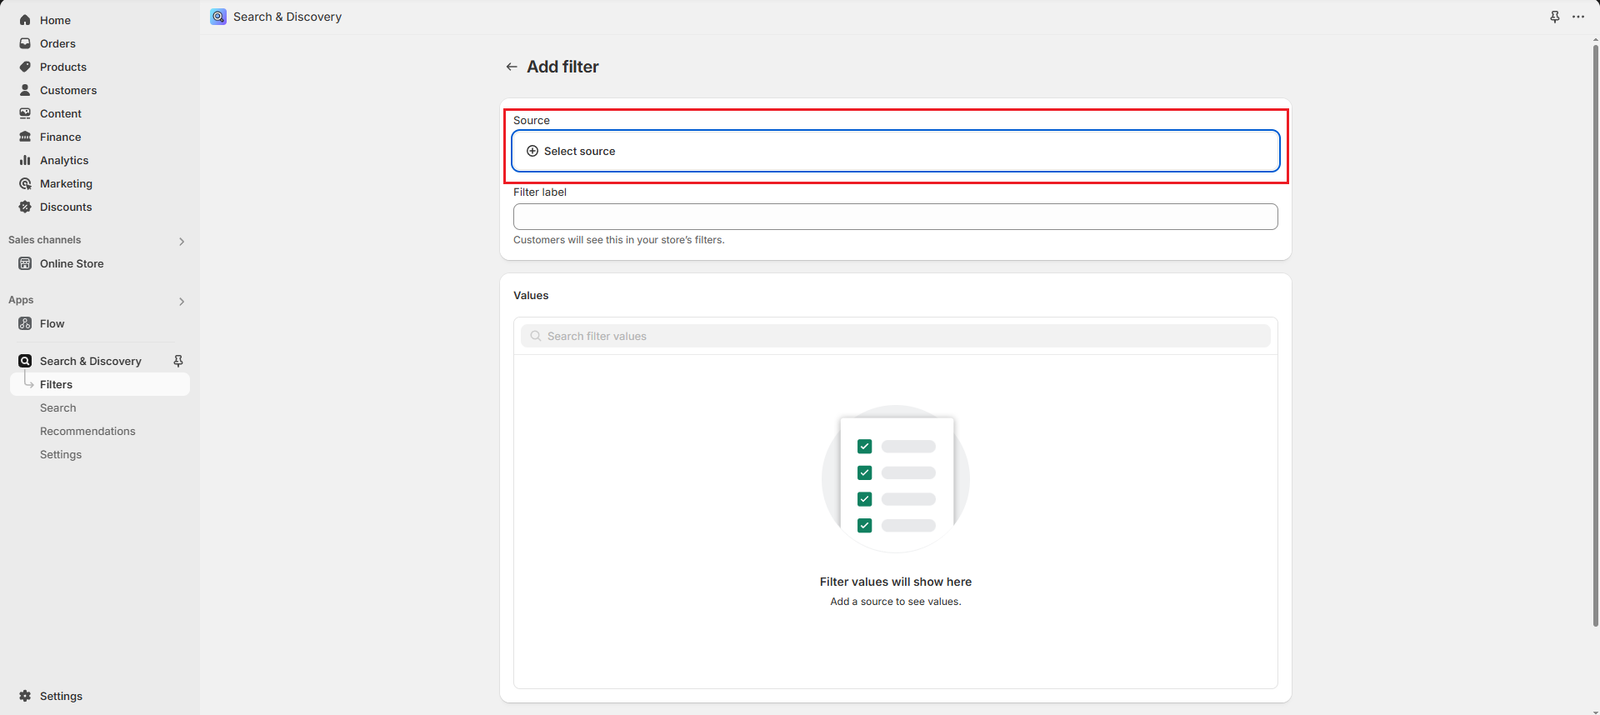
- Click on Add filter
- Click on Select source
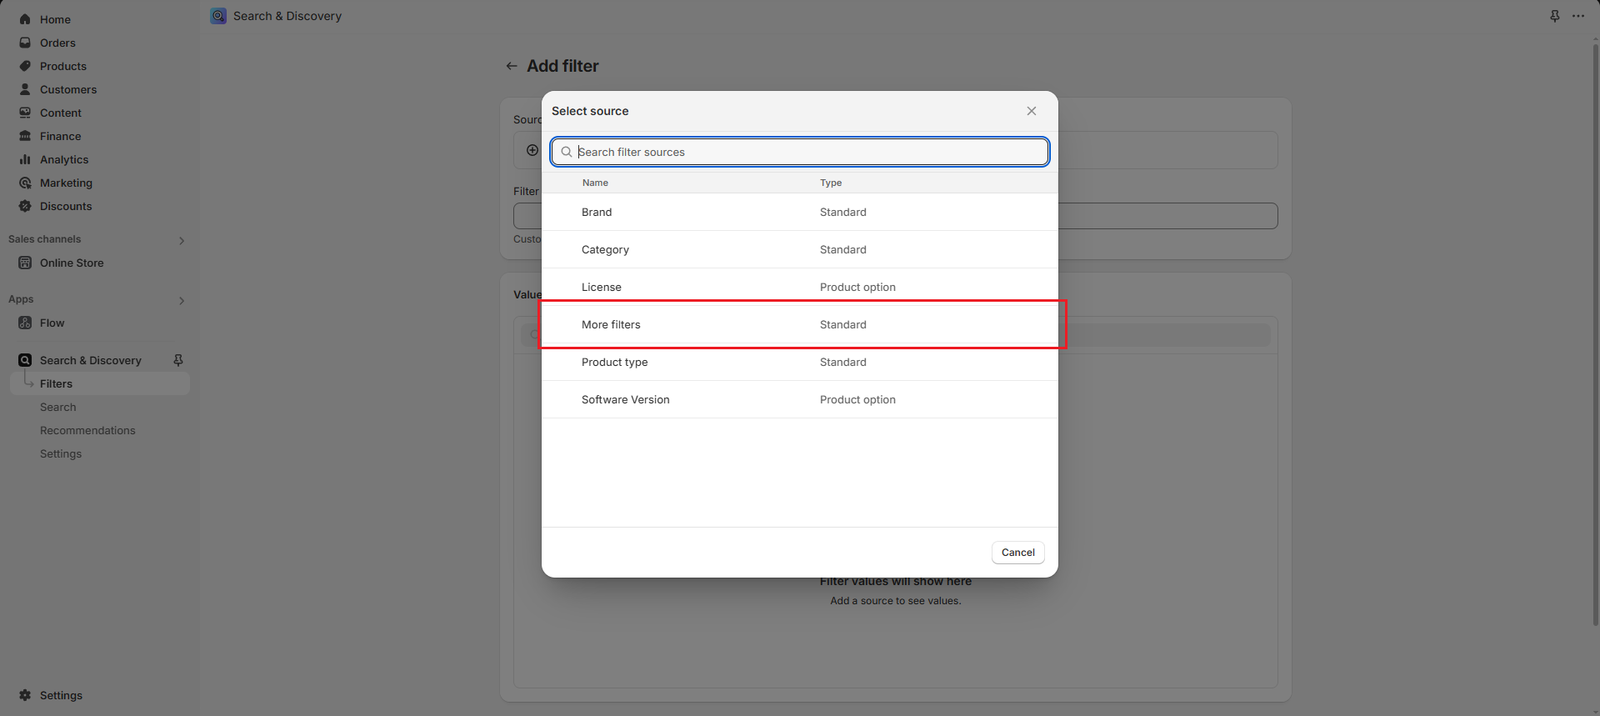
- Select More filters
- Change the filter label and logic if you like and click on Save
- The filter will now be available in your products page
How to choose between the default collections tag filter and Search & Discovery application
We provide a theme setting that allows you to choose between using the default collections tag filter and the Search & Discovery application.
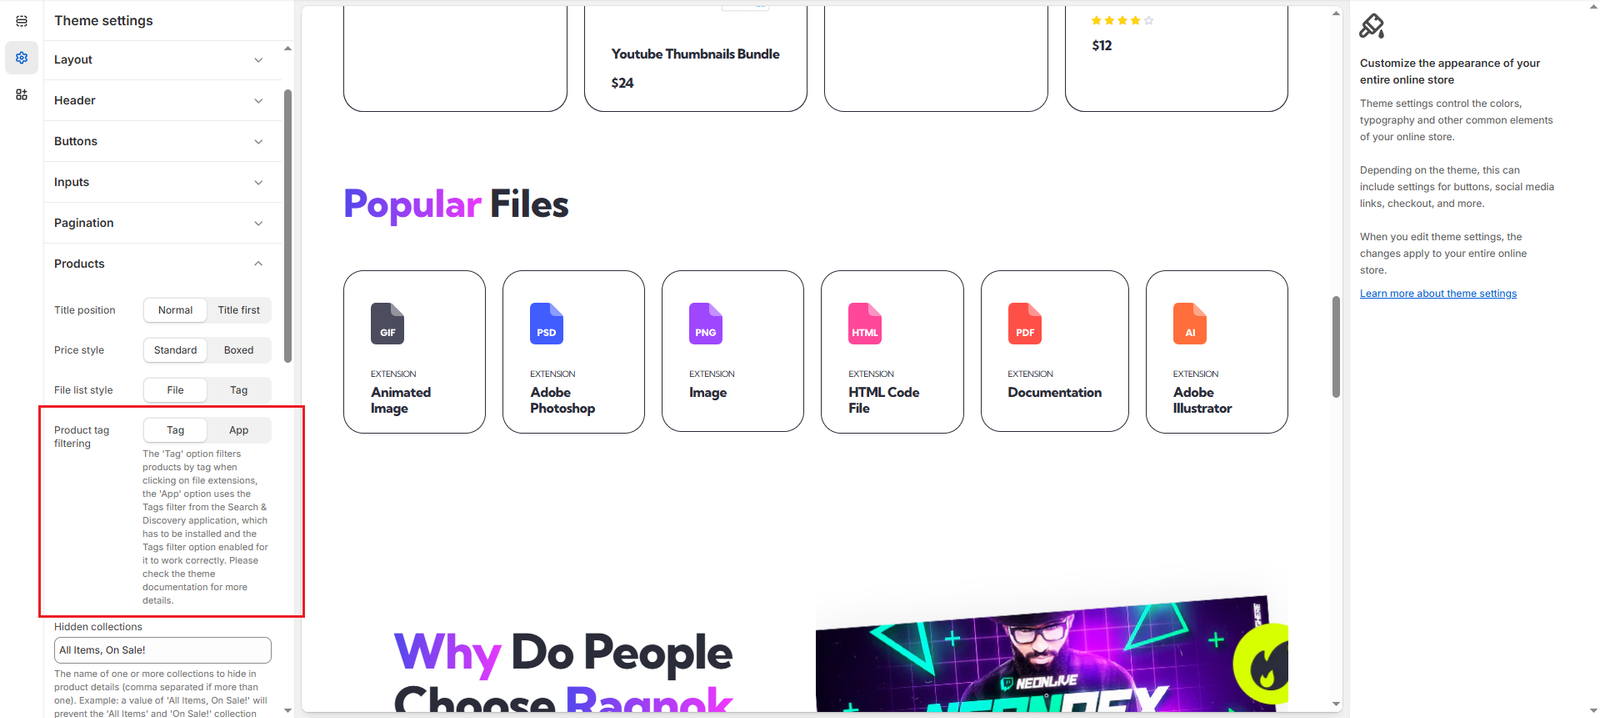
Go to your theme settings > Products > Product tag filtering, selecting Tag will use the default collections tag filter, while selecting App will use the Search & Discovery application:
How to make products display based on selected file tag
In order for appropiate items to show on the products filtered page, you need to add the respective file extension name as a tag to those products.
To assign the psd tag to a product:
- Go to your backend Products menu and click on the product you want to add a tag to
- Scroll down until you find the Tags section on the right side of the screen
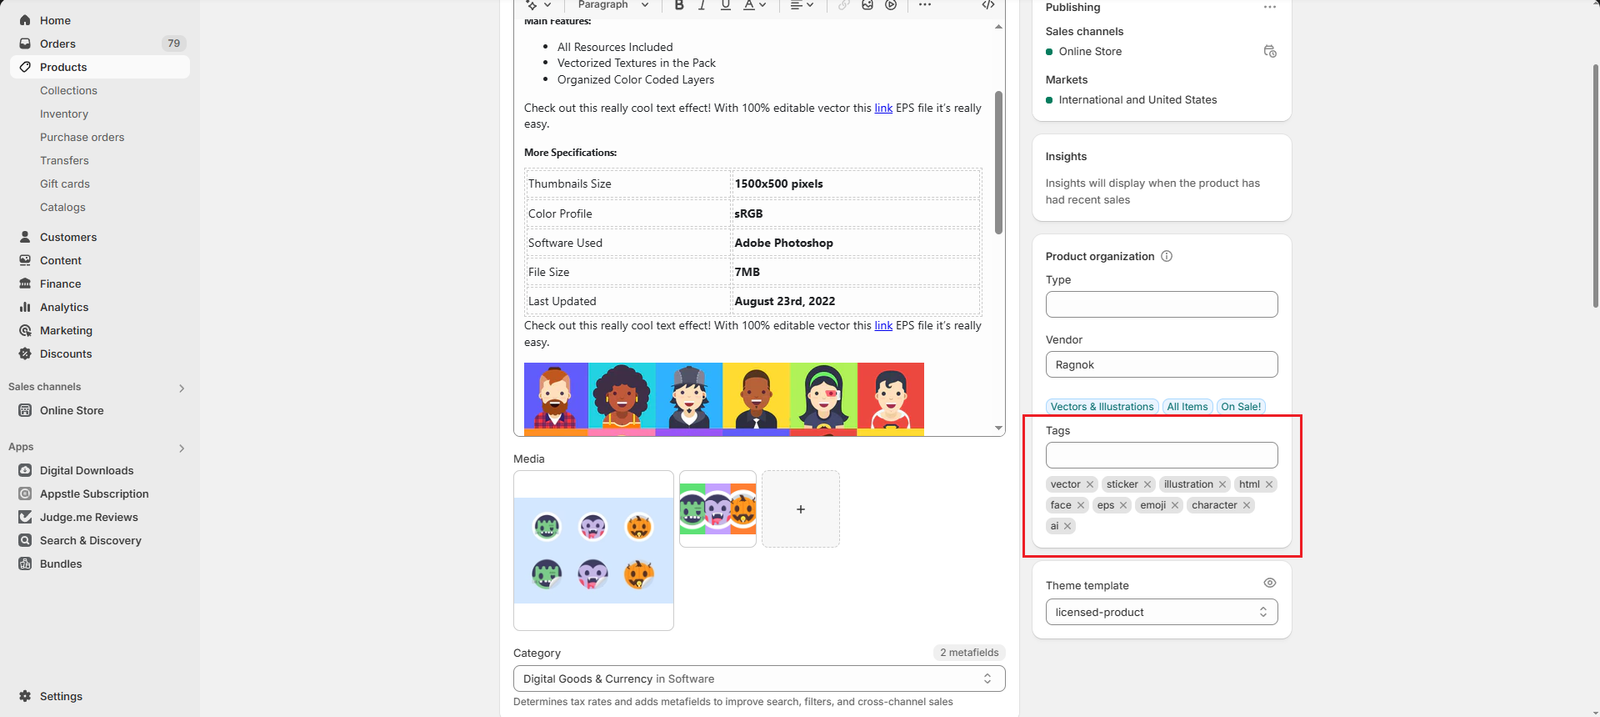
- Add the psd tag
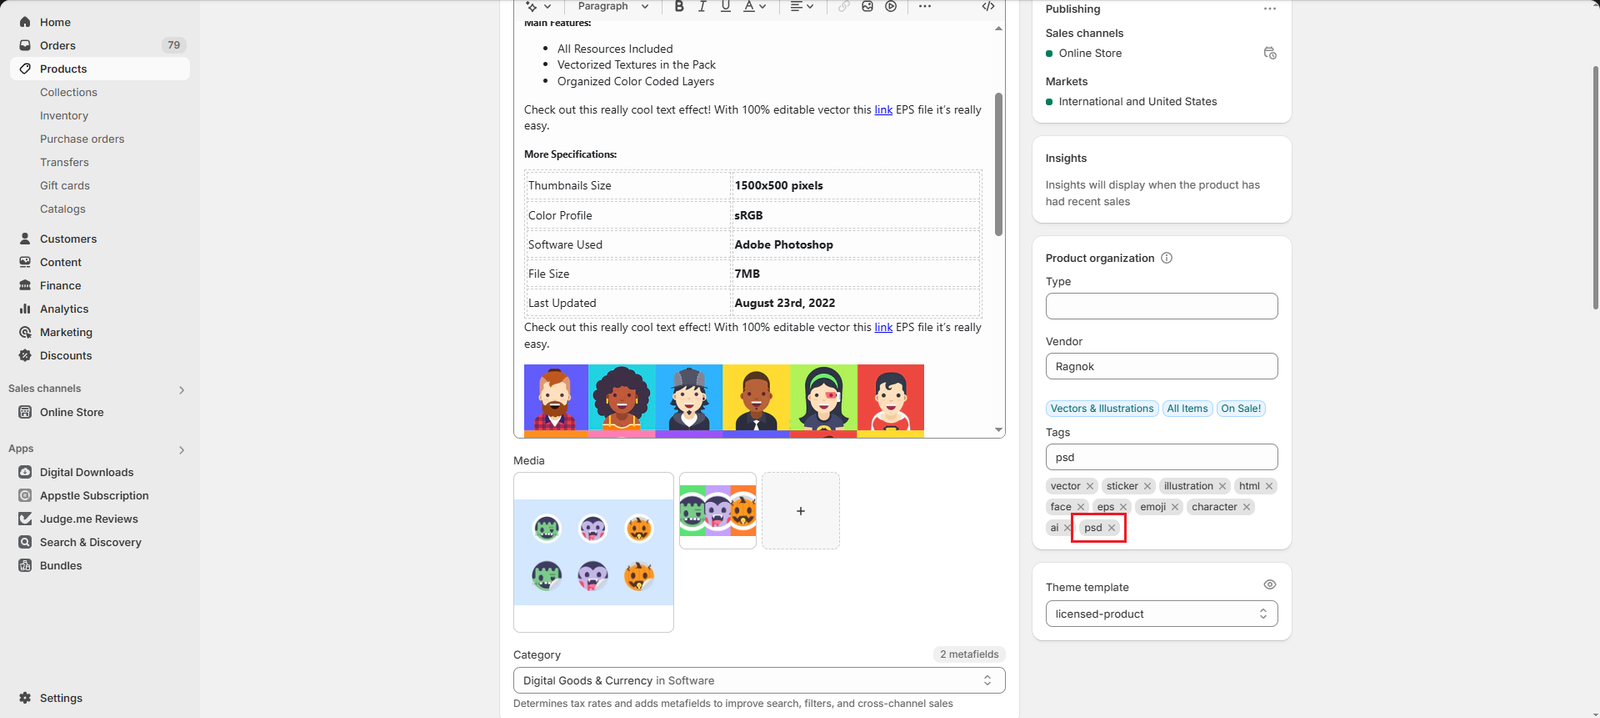
- Click on the Save button to update your product with the new tag
- This product will now display on your product page when filtering by PSD files (You can also choose to apply multiple file name tags to your products and they will display when filtering by each of them.)
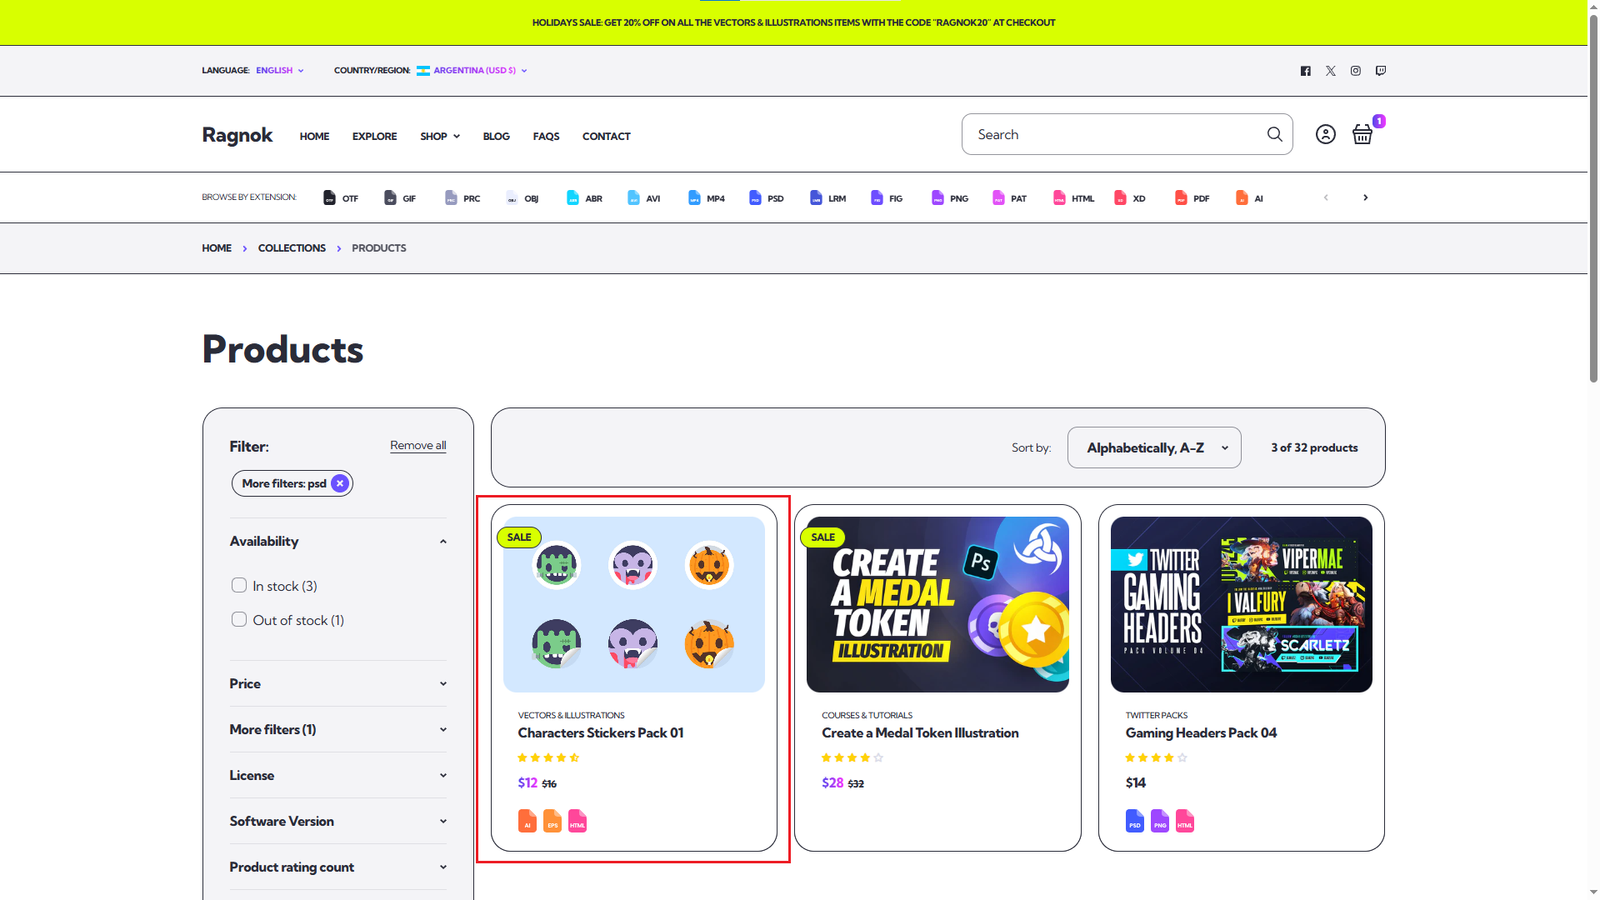
The product shows even though we haven’t assigned the respective PSD file information when adding files to that product, so the PSD file sticker is not being displayed.
As you can see, filtering by tag and the product file information are assigned separately.
Frequently Asked Questions
What files / extensions are supported by the theme?
The theme supports the following extensions (you can use any of the following in the File Extension field of the Product File metaobject):
| Supported file extensions |
| abr |
| ai |
| atn |
| avi |
| css |
| eps |
| fig |
| gif |
| grd |
| html |
| jpeg |
| js |
| lrm |
| mov |
| mp3 |
| mp4 |
| obj |
| otf |
| pat |
| png |
| prc |
| psd |
| skt |
| svg |
| xd |
Please check the Graphic Resources section of this documentation if you want to preview file and tag image variations.
Can i change the images that are displayed for each file type?
Yes you can!, the SVG are loaded from the theme snippets/ directory, so for example if you want to change the image that is used for pdf files, you need to replace the SVG under when ‘pdf’ with your custom SVG in the following files:
File:
- icon-product-file.liquid
- icon-product-file-small.liquid
Tag:
- icon-product-file-tag.liquid
- icon-product-file-tag-small.liquid
Please notice how there are different SVG for normal and small sizes as well as different file styles (regular file and tag).
Can i add support for more files / extensions?
Yes you can!, using the same process as described here, you can add your custom when statements with your extension name and respective SVG, which will be used when adding that extension via the metaobject definition.